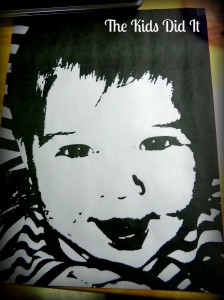
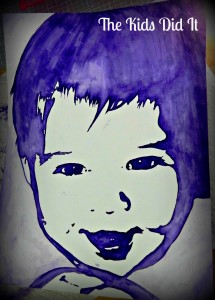
I have discovered my new favorite hobby! Painting beautiful watercolor portraits of my girls…or anyone’s kids, for that matter! I’ve always been a lover of all things artsy-fartsy, though I wouldn’t necessarily consider myself especially gifted in any way, shape, sort or form. I LOVE to do artsy things, whether they come out how they are supposed to is another story! Needless to say, I was over the moon when I finished my first watercolor! I couldn’t believe how simple it was! And it was the first time I’ve ever attempted to use watercolors.
One day while I was perusing Pinterest, I pinned a pretty watercolor pic and added it to my list of things to look at later. Later finally rolled around and I was thrilled when I read the article behind it. This blog, Grow Creative, gave perfect and simple directions for creating your own watercolor portraits. I was still pretty intimidated, but I gave it a whirl! Now that I’ve got a few under my belt, I’m almost cursing myself for not trying this sooner!
You will Need:
computer
a couple digital photos
printer
printer paper
pencil
light box (optional)
Sturdy watercolor paper, I prefer 140 lb.
watercolor paints
various watercolor brushes
1-2 small containers for water, I used disposable SOLO cups
2-3 paper towels
First things first, you need to select a digital picture. Look for one that offers some shadow. I picked out a couple that I liked and ended up narrowing them down after I finished the next step.
That being said, the next step is to change the picture to black and white, or any two colors as long as one is light and the other is dark. You can do this a couple different ways, but I think this is the easiest! Start by opening up PicMonkey.com. This is free photo editing software that I have grown to love. Select Edit Photos and upload your picture. On the left hand bar, select the Effects option (looks like a little science beaker) and scroll down, close to the bottom and click on the Posterize option. This will change your picture into some wonky looking colors. In Posterize, slide the colors down to 2. This is very important, this project will not work if there are more than two colors. Leave the Details at 80% and the Fade at 0% and hit Apply. This will give you your two-color picture, essentially your guide for your watercolor portrait. I messed around with a couple different pictures before I decided which one to use. Just because you like a particular picture doesn’t mean that it will work in the two color format. Don’t give up! I have yet to try a portrait that hasn’t turned out nicely!
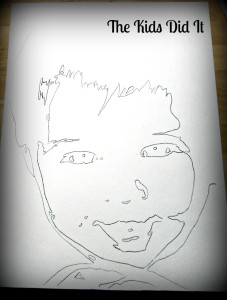
After you have saved your picture, you will need to print it out in black and white. I chose to stick with the 8.5 x 11 size. Once you’ve done that, it’s time to transfer the picture to your watercolor paper. There are a few ways this can be done too. The blog I read recommends flipping your print out over and lightly coloring all over the back of it with a graphite pencil and then flipping it back over and tracing the front onto the watercolor paper. For me that took too much time and energy, however it was very effective. I thought about using carbon paper but thought the lines that it created where too dark to cover up with watercolor paint. So finally I pulled out my light box. I figured the watercolor paper would be too heavy, but it worked out just fine, thankfully!! If you do not have a light box, I do think using the pencil coloring method is your best option. Using a sharp pencil, start tracing around the light and dark areas of your print out. The idea is that you want a LIGHT tracing of your printout on the watercolor paper. You need it to be dark enough for you to see to paint, but light enough so that lines will disappear under the paint. Watercolor paint is very thin and won’t always cover up your pencil lines. The lighter your tracing is, the better, in my opinion.
Time to start painting so gather up a couple cups for water and a couple paper towels! I used two cups for water; one for cleaning out my brush, and one for adding water to my paints and brushes. I laid my watercolor paper on a paper towel ( I have a tendency to be pretty messy) and had another one to dry my brushes on and another one to wipe my brush on from time to time. You may not need all the water and towels, but this is what worked for me. Dip your brush into some water and rub it around on the paint patty and go to town on your paper. I kind of alternated between dipping my brush into plain water and the paint. There is no right or wrong way about it, in my opinion, just start filling in your picture. It’s nice to keep your print out handy to help with the dark and light spots. I chose to stick with one color, but it’s also nice to add a touch of a complimenting color to some areas to high light the picture. Once you have it all filled in, you are all done! Let it dry. You may want to pin down/tape down the edges: as the water dries, the paper does have a tendency to curl a bit. Add your picture to a nice matted picture frame and you have a beautiful piece of artwork to hang on your wall or give as a gift!


I have to try this! What a great idea.
Stephanie recently posted..Omelet in a Ziplock
Wow! This is so cool! I have to try this..so cute!
SABRINA DIX recently posted..FREE order of Small Cheese Fries at Outback May 2 & 9
This is such a neat idea! Thanks for sharing — I’m pinning it, too!